
Do you want to securely mount your expensive GPU in your PC? If so, then this step-by-step guide is perfect for you!
Installing a vertical GPU mount can be a daunting task, but this article will make it easy and convenient. You’re only a few steps away from freeing up space in your rig and elevating your gaming experience!
If you’re looking for an attractive yet practical way to mount your graphics card in your gaming build, then you should consider a vertical GPU mount. This type of mount allows you to position your GPU at an angle, freeing up space and providing better airflow. This step-by-step guide will provide all the information you need to successfully install a vertical GPU mount in your PC build.
We will start off by discussing the components of a typical vertical GPU mount. We’ll then move on to exploring how to prepare and install the mounting hardware needed for mounting your card vertically. Finally, we’ll show you how to orient and cable manage your GPU for an orderly-looking finished product. By the end of this guide you should have all the knowledge needed for a successful vertical GPU installation.

Explanation of a Vertical GPU Mount
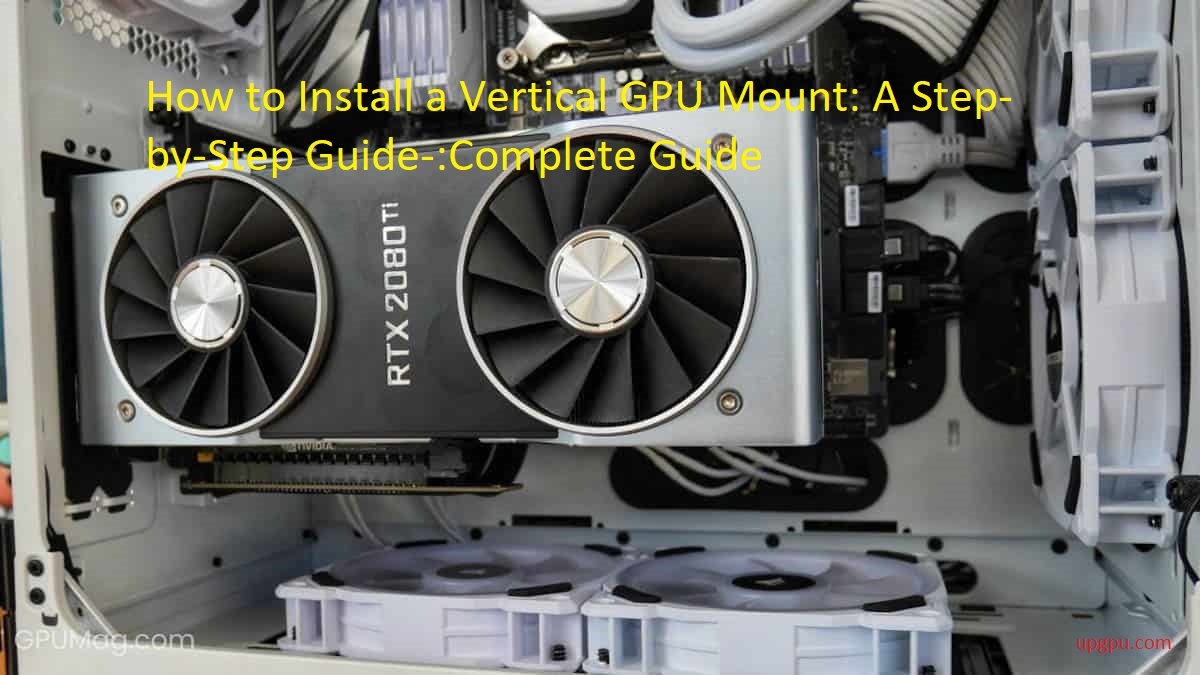
A vertical GPU mount is a device used to attach a graphics processing unit (GPU) card to the top of your computer case. It’s best suited for high-end systems with large cases, especially those that employ more than one GPU at once. With a vertical GPU mount, your GPU will be raised up off the motherboard and suspended neatly above the motherboard tray. This gives your system a unique look, plus it allows you to better manage space within your case.
To install and configure your vertical GPU mount, it’s important to understand some of the hardware and wiring aspects involved in this process, as well as how to safely work with delicate components on an electrostatic discharge (ESD) safe work surface. Before getting started, make sure you have all the necessary components for installation including screws for attaching the mount and isolators or risers for denser cards. Once you’ve got everything ready to go, begin by identifying the required mounting points on both the case and card before securely fastening your mount in place with screws.
After that is done, get ready to make connections by plugging expansion plates into PCIe slots on both sides of each card port being used simultaneously if applicable. Also make sure appropriate power connections are made when running multiple cards — if in doubt consult manufacturer documentation first! Finally season off assembly by looping wires behind tray messaging ports along base plate so that it won’t interfere airflow or access later down line stage when checking water pipes servicing VRM section between expansion slot boarder layers near mother board edge!
Advantages of a Vertical GPU Mount
A vertical GPU mount has several advantages. It allows you to fit the graphics card within a limited space and improve airflow, removing heat away from the tower. Additionally, it takes the strain off of your motherboard by reducing the weight strain on it. This can extend its lifespan and minimize potential damage due to overheating.
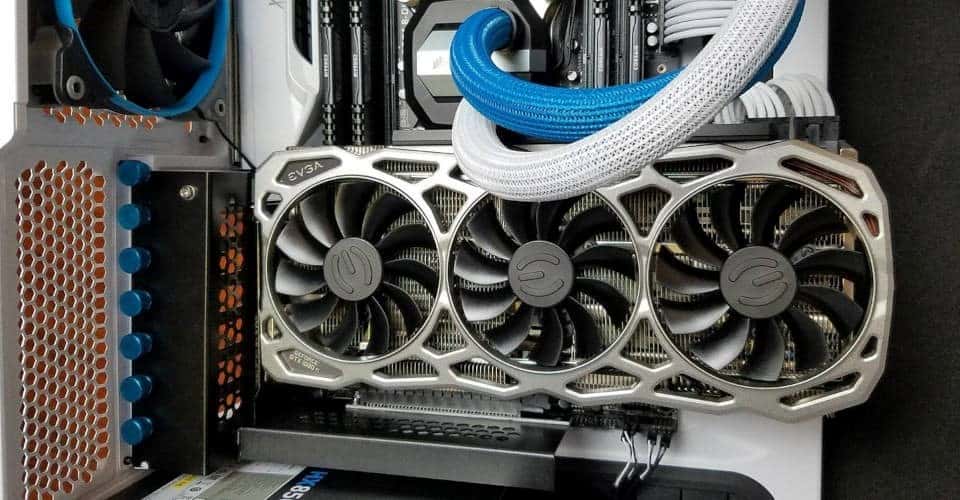
Furthermore, this type of mount also helps to reduce clutter in your gaming PC as it utilizes as little space as possible. Having your graphics card mounted vertically can also provide an aesthetic advantage, making your gaming PC look sleek and modern. Finally, mounting a graphics card in this manner makes it easier to access and upgrade the hardware when necessary.
Materials Needed
In order to properly complete a vertical GPU mount installation, there are certain materials you should have on hand. A list of items necessary for the task is provided below:
– PCIe riser or PCIe extender – check your specific GPU card type and select the appropriate model.
– bolts, nuts and washers (quantity will depend on your specific brand and model of GPU)
– mounting pieces such as screws, adhesive foam or other fastening material
– an anti-static wrist strap to prevent sudden shocks that could damage your components
– screwdrivers
– pliers
– other basic tools such as a drill, saw, etc. depending on your installation requirement
Be sure to double check your particular device requirements before purchasing any additional hardware.
List of Required Materials
- List of Required Materials
When installing a vertical GPU mount, there are a few items that you will need to ensure a successful installation. Begin by gathering the materials listed below:
- Vertical GPU mount bracket
- Screws
- Screwdriver
- Drill
- Spacers (optional)
- Preparing for Installation
Now that you have all the necessary materials, it is time to prepare for installation. Before mounting the bracket, you will need to select the desired mounting location and secure it to the case with screws. Make sure that you leave enough room for the spacing of your components, including graphics cards and cables. Additionally, if desired, spacers may be used to provide additional support and stability when securing the bracket in place.
Description of Each Material
Before you start the installation process, it is important to make sure that you have all the necessary materials. Below is a breakdown of each item and its purpose in the installation.
Hardware:
-Screws: These are used to fasten the vertical GPU mount to your case. Depending on your case, you may need different lengths of screws or different types (e.g., Philips or flathead). Make sure to check with your manufacturer for specific instructions.
-Standoffs: Standoffs are used to provide spacing between the mount and your case, as well as additional support for mounting larger GPUs. A common size is “M3x6mm” but make sure to check with your manufacturer if you’re using a larger GPU card.
-Mounting brackets: Mounting brackets are used along with screws and standoffs in order to secure the vertical GPU mount onto the side panel of your case. Make sure that the bracket is compatible with both your case and GPU before attempting installation.
-Washers/Nuts: Washers and nuts are sometimes included in larger cases in order to further secure the mounting brackets onto the side panel of your case. Make sure these items fit correctly before attempting installation!
Other Materials:
-Cable ties/Zip ties: Cable ties or zip ties can be used to organize any loose cables or connections after installing your vertical GPU mount in order keep everything neat and tidy inside your case.
-Thermal paste/Grease: Thermal paste or grease helps improve heat dissipation within a system through increased contact between any two surfaces, resulting in better thermal transfer efficiency between components such as chipsets and motherboards, GPUs, CPU coolers, etc… Make sure you have this on hand before beginning installation!
Preparation
Preparation is an important step in ensuring the successful installation of a vertical GPU mount. Before making any modifications to the computer, it is essential to ensure that all component parts and tools are correctly identified and organized. Assemble the mount according to the instructions provided, paying close attention to tightening any screws or bolts securely.
Carefully review the instructions provided with your GPU mount for additional tips on how to properly secure it. Familiarize yourself with best practices when working with computer hardware before beginning your install. You should also ensure that you have all necessary tools like a screwdriver and needle-nose pliers as you may not be able to complete this project without them.
Next, power off your computer completely and unplug any cables from it. If your GPU has not been installed already, carefully fit it into the appropriate slot in your motherboard before affixing it to its mount. Make sure that there is sufficient room for airflow around the graphics card as this will help keep components cool during prolonged use.
After thoroughly checking that everything is ready for installation, you’re ready for Step IV!
Safety Precautions
- Safety Precautions
Before getting started with the installation of your vertical GPU mount, there are some important safety precautions you should be aware of. Firstly, make sure that the area around your work is well-ventilated and free from any combustible materials as you will be working with power tools and equipment. Secondly, make sure that you properly secure your GPU mount to reduce the risk of it falling or shifting unexpectedly. Finally, always wear appropriate eye and ear protection when working with tools and take regular breaks if needed. Following these safety precautions will help ensure a smooth installation process.
Preparing the Case
Before beginning the installation process, make sure you have all of the necessary supplies, including a screwdriver and screws for the vertical GPU mount. Make sure that the vertical GPU mount is compatible with your computer’s case. To prepare your case for installation:
- To begin preparing the case, remove any cables or drives that may be obstructing access to the mounting point on the bottom or rear panel of your computer’s case.
- You may need to remove existing fans or other components that were installed near this area in order to make room for the vertical GPU card holder and its accompanying components. Label each component so you can find it easily when it’s time to replace them later on.
- Once all of these components are removed, take out any screws that were holding them in place and store them separately so they can be easily located when it’s time to put everything back together after installation is complete.
Testing the Installation
Now that your vertical GPU mount is completely installed, it’s time to test it out. Before testing the mount, make sure that all of your hardware is firmly secured and no cables are loose or becoming disconnected. Start by turning on your PC and letting it boot up. After logging in, you should see the graphics card and its drivers already installed. To confirm this, open the Device Manager and locate the Display Adapter section. Under this section, you should see your GPU along with its information.
Once you have confirmed that your GPU is properly installed, perform a stress test to ensure that everything is running correctly. Open a benchmarking software such as FurMark or Unigine Valley and run a performance test with all of the graphical settings set to their highest levels. This will determine if your cooling system can keep up with the demanding requirements of running higher graphical settings while ensuring that there are no stability issues caused by heat or other factors within the system. Once you’re satisfied with the results of the performance tests, you can be confident that your vertical GPU mount was successfully installed!
Powering on the System
When getting started with installing a vertical GPU mount in your computer, the first step involves powering on the system and making sure that all necessary components are connected. Before attempting to install the mount, ensure that all cables are properly connected to your motherboard. This should include your CPU power cable, the data cables for any hard drives and SSDs (in addition to an optical drive if applicable), video card power connectors, and any other necessary peripherals.
Next, make sure that the CPU coolers are properly mounted over your processor, and there is sufficient airflow travel within your case. If a fan is not running or there is very little air being moved around within the chassis of your case, then this could lead to heating issues once you begin installing in with components. Once everything seems normal when running tests on the system for several minutes, you can move on to actually mounting the GPU vertically.
Checking the GPU Temperature
Once you’ve installed your vertical GPU mount, it’s important to check the temperature of the GPU at regular intervals. This will help ensure that your setup is running optimally and will allow you to identify any potential issues before they become a problem.
With most GPUs, you can use either the device itself or one of several different pieces of software to check temperatures. Most major brands like NVIDIA and AMD include temperature monitoring in their control panels and software utilities such as MSI Afterburner or ASUS GPU Tweak II also have similar features. If your card is equipped with an LED display, this can also be used to monitor temperatures.
When running tests, it is best to use an application like Furmark that puts a heavy load on the GPU in order to get the most accurate results possible. Be sure that you are aware of any temperature threshold that your card may have and stop testing if this limit is reached. Keeping an eye on temperature is essential for any serious PC gamer or builder – make sure you check yours regularly!
Conclusion
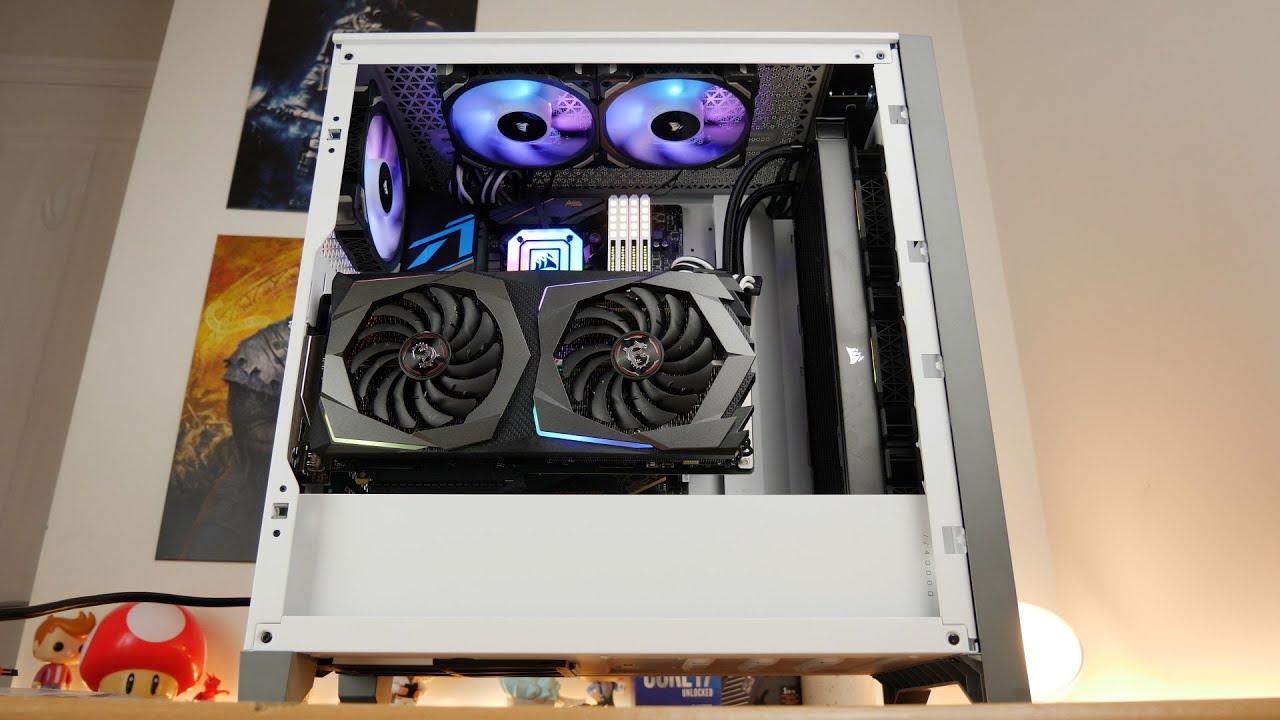
Installing a vertical GPU mount is often the preferred solution for achieving better air circulation and a more organized look in your computer case. While there are many DIY solutions, good quality mounts made of either plastic or aluminum can be purchased online for around 20-30 USD.
By carefully following the instructions provided with your mount, you should have a reliable and secure setup in no time. Make sure to check compatibility between your video card and mount prior to purchase to ensure that they will work together.
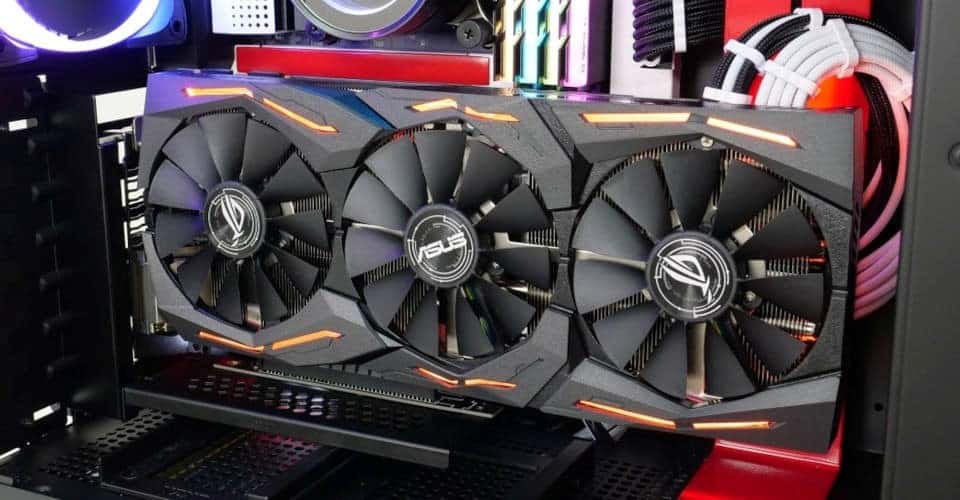
With a properly installed GPU vertical mount, you will be able to enjoy improved cooling performance as well as an aesthetically pleasing PC setup.
FAQs
Is it good to mount GPU vertically?
Mounting a GPU vertically can have both aesthetic and functional benefits, but it depends on the specific case and the cooling setup.
What is vertical mounting?
Vertical mounting is the installation of a graphics card in a position where it is mounted perpendicular to the motherboard, usually using a PCI-E extension cable.
How do you mount a graphics card?
To mount a graphics card, you need to locate the PCI-E slot on your motherboard, insert the card into the slot, and secure it with a screw or latch. Some cases may require additional steps, such as removing a metal bracket or using an extension cable for vertical mounting.
What are the disadvantages to vertical GPU?
Vertical GPU mounting can potentially impede airflow and cause higher GPU temperatures, especially if the case has poor ventilation or if the GPU cooler is designed to work with a horizontal orientation. Additionally, some GPUs may experience reduced performance due to the added resistance of the extension cable.
Why do GPU fans face down?
GPU fans usually face down to draw cool air from outside the case and exhaust hot air out the back. This setup takes advantage of the natural convection of heat and prevents the GPU from heating up the rest of the components in the case.
Should I put my GPU in the top or bottom slot?
In most cases, it is recommended to use the topmost PCI-E slot on the motherboard for the graphics card, as it usually has the most bandwidth and the best cooling. However, this can vary depending on the motherboard and the case layout.
Can you run a GPU without a backplate?
Yes, you can run a GPU without a backplate, but it may increase the risk of PCB flexing and damage, especially if the card is heavy or if there is no support bracket. A backplate can also provide additional cooling and structural rigidity.
Can a GPU bend?
Yes, a GPU can bend due to its weight, thermal expansion, or external forces. PCB flexing can potentially damage the GPU or other components, affect performance, or cause stability issues.
How high should GPU load be?
The GPU load depends on the specific application and the desired performance. In general, a higher GPU load indicates that the card is working harder and potentially generating more heat, but it is not a direct measure of performance. Optimal GPU load varies depending on the use case and should be balanced with temperature and noise considerations.
How do I water cool my graphics card?
To water cool a graphics card, you need to install a water block on the GPU and connect it to a compatible liquid cooling system, which includes a pump, a radiator, and tubing. The installation process can vary depending on the specific hardware and requires careful planning and maintenance. It is recommended to consult a guide or a professional if you are new to water cooling.
See More
- Best vertical GPU mount 2023
- Best GPU for Ryzen 7 2700x 2023
- Best GPU for Ryzen 7 3700x 2023
- Best gpu for ryzen 7 5800x 2023
- Best gpu for ryzen 9 3900x 2023